

Blog 2: Let's Get Started on using Git and GitHub
Push your projects to Github, Collaboration...

Hello, I'm a Frontend engineer with a passion for learning new tech, writing blogs, and sharing my knowledge with others.
Apart from coding, I love staying up-to-date with the latest trends and tools in the tech industry. I'm always learning and exploring new technologies and techniques to improve my work and create more efficient and scalable solutions.
I enjoy sharing my knowledge with others through writing blogs and creating courses. Recently, I created a course for Educative on React.
As a freelancer, I'm seeking projects related to Shopify and React. I enjoy working on projects that challenge me and help me grow as a developer.
This is 2nd Blog for the 4 Blog series (From Git to GitHub) . I hope you have read 1st Blog in which I have told you about the installation of Git and GitHub.
This blog is divided into 2 parts:
- Push Your Projects to GitHub.
- How to collaborate on Github.
Before proceeding in this blog further first we will check whether you have successfully installed Git.
- Open your Command Prompt and type this 👉
git --version
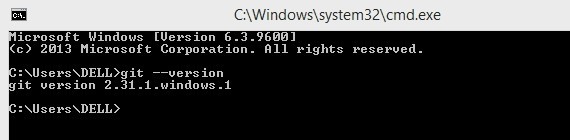
If you have installed Git properly it will show as above Version might be different. Moving on to the most important part of this blog.
Push Your Projects to GitHub.
- Create a Folder: For this step, we're not going to use Git. So as to keep this blog beginner-friendly. But I will share the commands in the last blog of this series. Create a folder on your System:
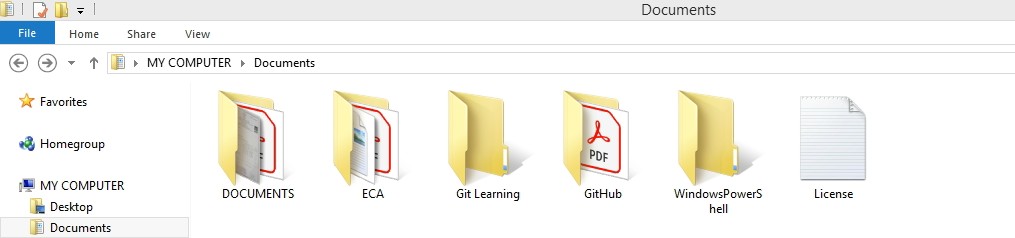
I have given it the name Git Learning.
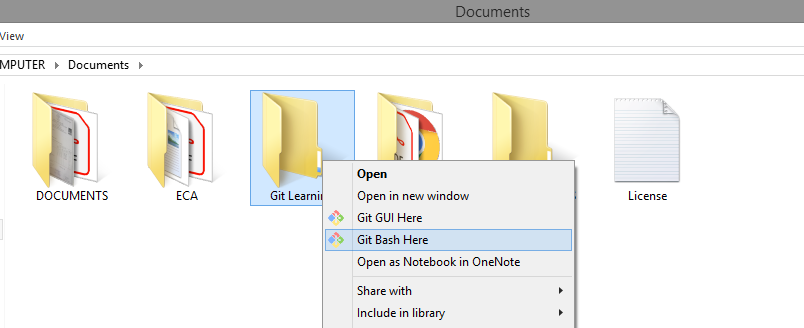
2 . Now Right Click on it and click on Git Bash. It will open your Git Bash on your system.
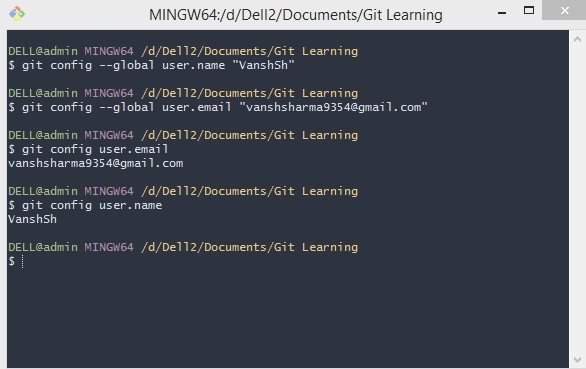
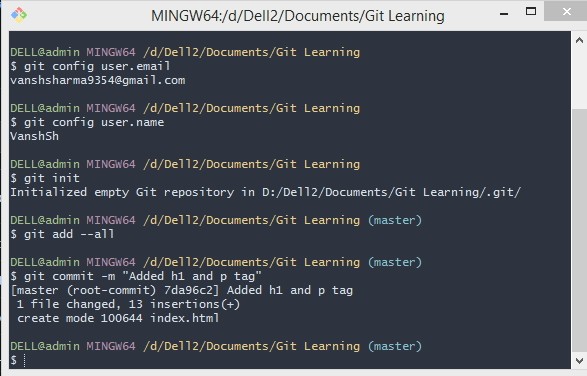
3 . Now if you are doing it for 1st time. Add your Name and Email in it.
git config --global user.name "Your name"
git config --global user.email  "Your Email"

// You can check your credentials by:

git config user.name
git config user.email
4 . Now Open your Code Editor and Open Git Learning folder in it.
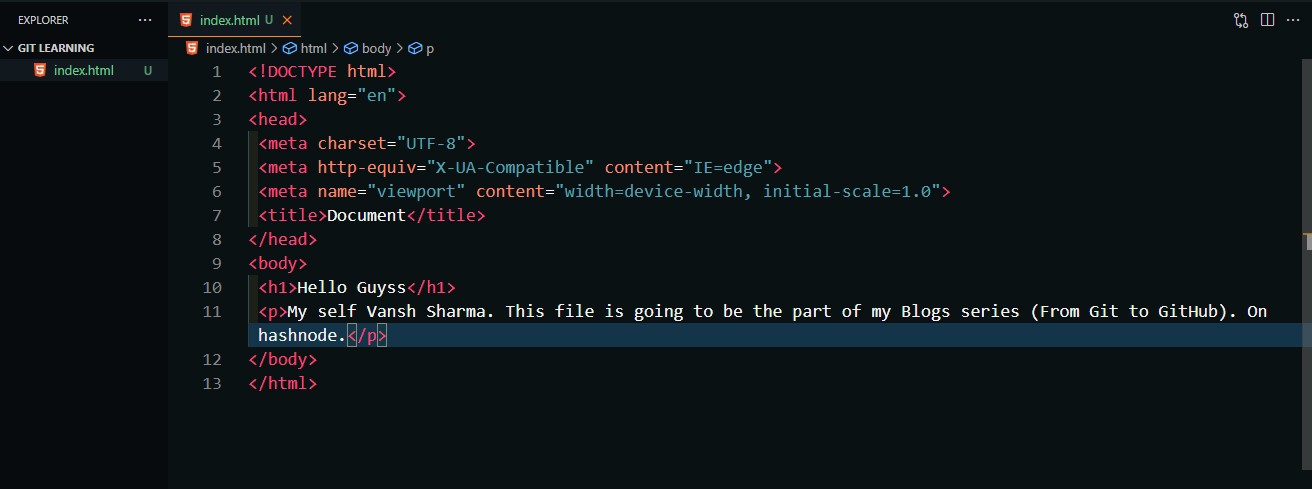
Add a index.html file in it.
5 . Now Go back to Git and type git init . This will initialize the hidden file in your folder. That will store all your changes in a file.
Bonus: Now this will turn your file color in Code Editor as Green. Which shows that git is working.
6 . Now Go back to Code Editor and show your knowledge of HTML/CSS and make some changes in your file.
7 . Now after making these changes we have to Stage(make changes ready to push) these changes. And after staging we have to Commit(adding some explanation to our messages).
git add -all  <!-- To Stage -->

git commit -m "Your message" <!-- To Commit -->
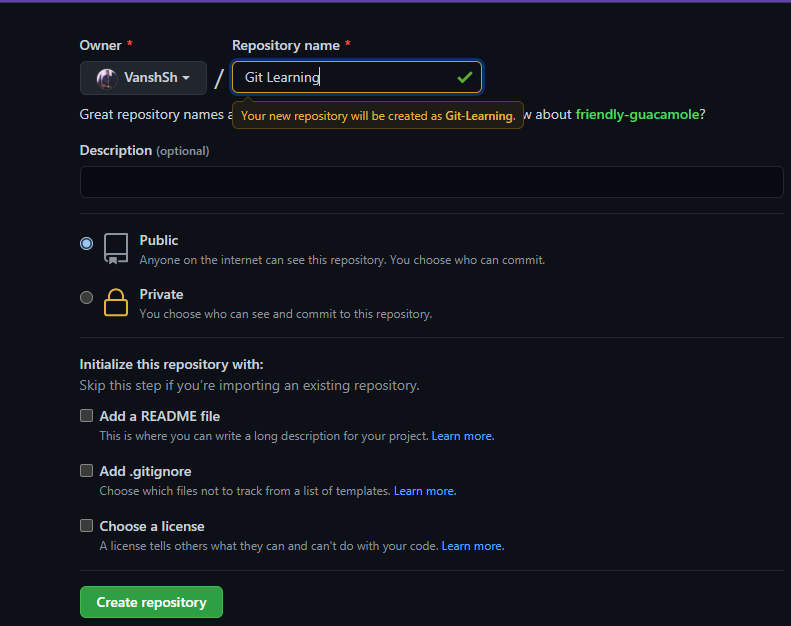
8 . Now Create a GitHub in your account
- Click on New Repository.
- Give Repository a Name.
- Click Create Repository.
- Now copy URL
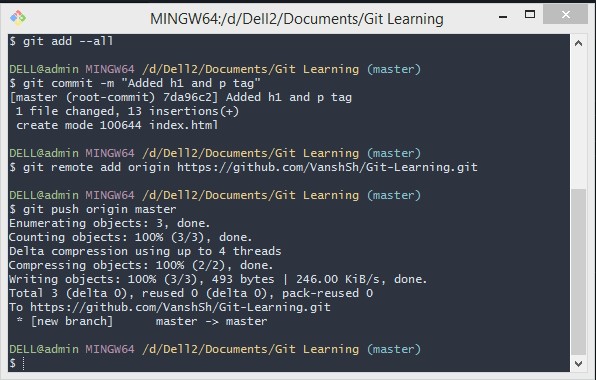
9 . Now Go back to Git and add
git remote add origin *(paste that URL here)*
This will help you avoid typing long URL again and again. Rather this command has added origin as your shortcut for that URL.
Use: shift+insert to paste and ctrl+enter to copy.
Now it's time to Push your changes to GitHub repo. Add
git push origin master
This will Push your all changes to Github.
Hurrah! 🎉 You have made your first GitHub repo. Go and Check it out.
How to Collaborate on GitHub
Remember this is not open source contribution that we will discuss in Next Blog but this is when you work in a team and you have to make changes in Project. In this part, we will discuss Branch which is one of the important topics while working on a group project.
For this part also I will be using the same repo as I used in the above part.
1 . Make some changes in the Readme.md section of the repo from Github account itself and commit it. (This will work as a contribution by some other member of the group.) Now copy the URL.
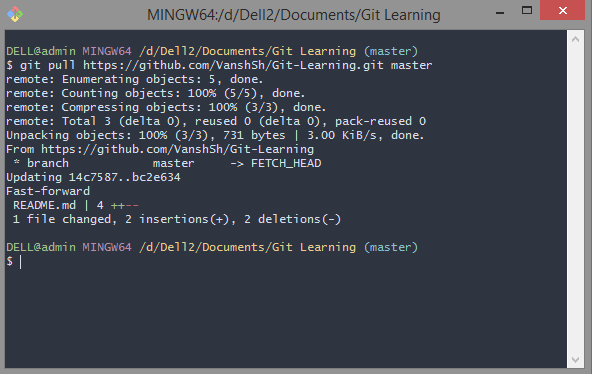
2 . Pull: Open the Git Learning folder in Git Bashand use:
git pull URL master

// Paste copied link in URL
This will bring all changes to your local system on Visual Studio Code.
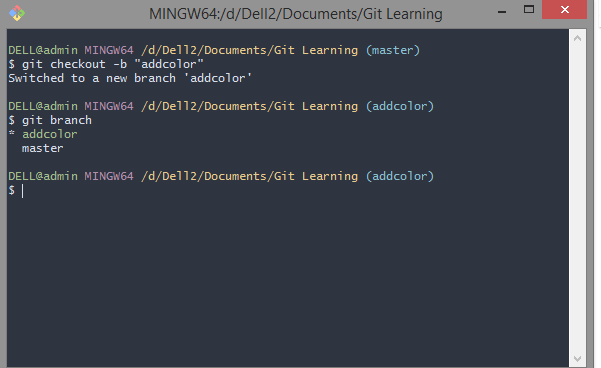
3 . Create Branch: Now while working on the group you are not supposed to make changes directly in Master branch. So to make any changes you have to first create a branch.
git checkout -b "Branch Name"
// At "Branch Name":  You should give some descriptive names related to
//changes you are going to make in the branch.
You can check your current branch by using:
git branch
// Branch with asterisk(*) will be your current branch
You change your branches using:
git checkout "branch name"
4 . Now make some changes in VS code.
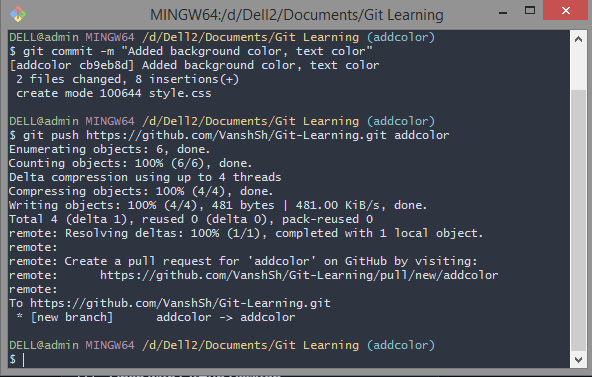
5 . Now Go back to Git and Stage and Commit changes as we have done in Part 1 👆.
6 . Now MOST important step. Always Remember while working in a group you don't add to Main Branch.
You have to Push the changes to github in branch. using:
git push URL branch name
// Branch Name: addcolor
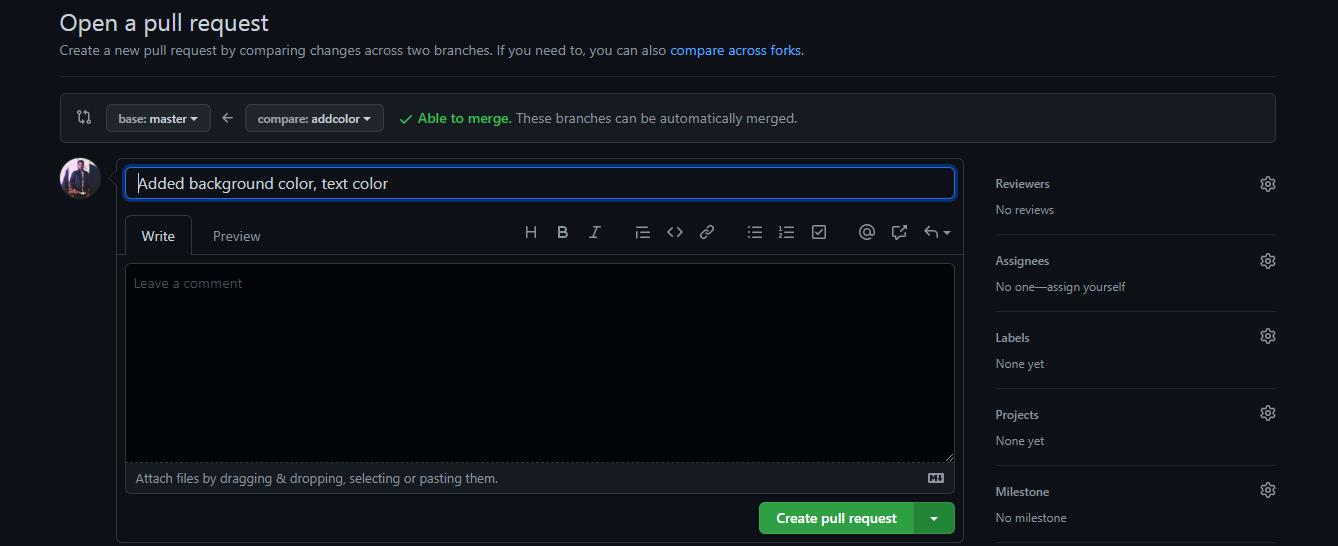
7 . Now Go to Github and you will see:
Compare & Pull RequestClick on it.
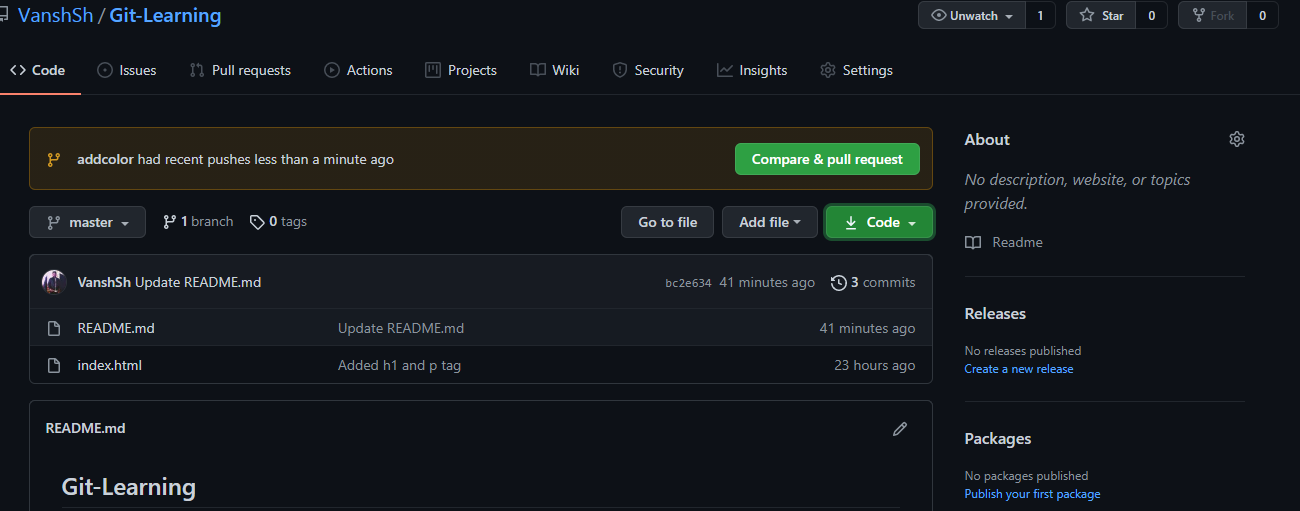
- After that click on
Create Pull Request.
- Then click on
merge pull request. As you are the author of the repo. So you are able to merge it. In practical life, while working in a group you should take clearance from your peers.
8 . Now it's time to delete your branch.
git checkout -d addcolor
Voila! 🎉 You have merged your branch in master branch.
Congratulations
You have successfully completed the 2nd part of this blog.
Now I know it might get overwhelmed in starting but worry not. Once you will do it 2-3 times you will like it and enjoy it. Believe me, in the initial days I also faced problems then it became very easy.
That's all for this blog. In Blog 3(5/7/2021) You will make your first Open-Source-Contribution. Until then Keep Learning, Keep Growing .
Connect with me 👇
| Gmail | DEV | ||
 |  |  |  |


